Intro
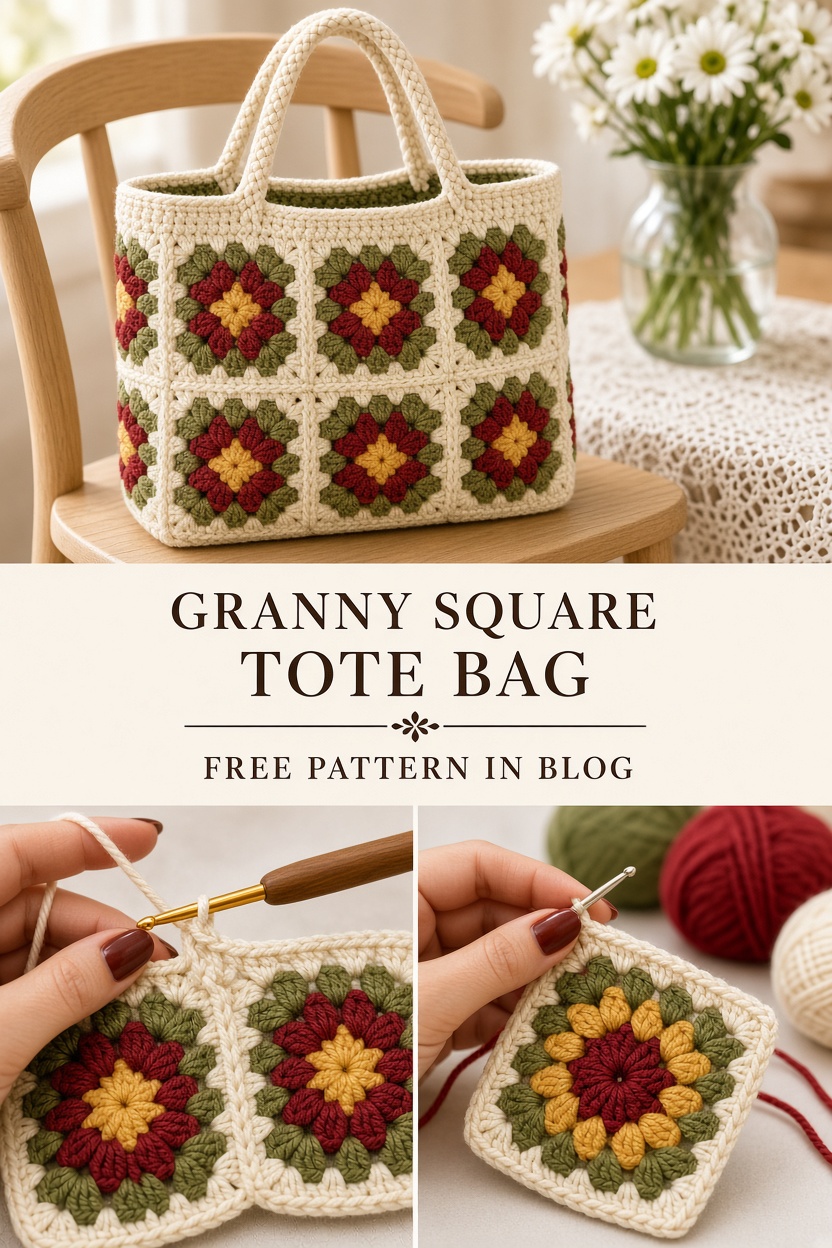
I remember the first time I sat down with a ball of sunshine-yellow yarn and a vision of a bag that could hold all my market treasures. A Granny Square Tote Bag Idea With Bright Flower Motifs has been a recurring dream in my crochet journey, blending the nostalgia of classic squares with the modern functionality of a sturdy market carrier. There is something truly therapeutic about watching a small, intricate flower bloom from the center of a square, and this free pattern is designed to guide you through that exact joy. I spent weeks swatching different weight yarns and experimenting with petal counts before settling on this specific motif, which strikes the perfect balance between delicate beauty and structural integrity.
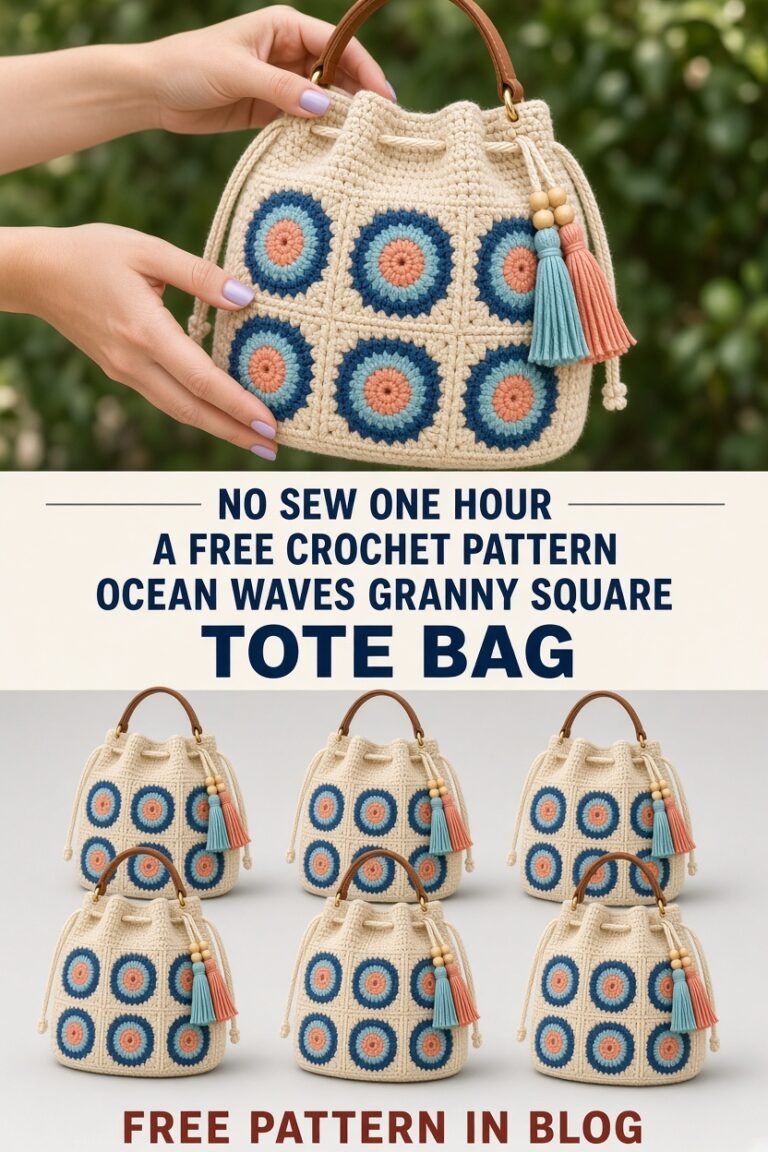
This tote isn’t just a project; it’s a companion for your weekend adventures, farmers’ market trips, or even just a stylish way to carry your current WIP (work-in-progress). The finished bag features a robust circular base and a spacious body constructed from sixteen identical flower-centered squares. Whether you are a beginner looking to master your first color-change project or an experienced crafter seeking a relaxing weekend make, this design offers the versatility you need. I have designed this with a structured finish in mind, ensuring it holds its shape while remaining soft enough to fold away when not in use.
When I finally stitched the last motif into place and attached the handles, I knew this would be a staple in my rotation. The bright flower motifs pop against a neutral background, making it both a statement piece and a practical accessory. This pattern is completely free for you to enjoy, and I have taken great care to explain every round in full detail so that you never have to guess at the stitch counts. Let’s dive in and create something truly special together.
About This Crochet Tote Bag Pattern
This project is built in three distinct phases to make the assembly process manageable and intuitive. First, you will crochet sixteen individual floral-centered granny squares. These motifs serve as the “tiles” that make up the main body of your bag. Once the squares are completed, you will join them into a four-by-four grid, which is then folded and seamed into a cylindrical tube. The second phase involves crocheting a sturdy, circular base that is joined to the bottom of this tube. Finally, we build the upper yoke, complete with eyelets for a drawstring closure, and add the finishing touches like straps and tassels to personalize your creation.
Quick Facts
- Finished Size: 12 inches (30.5 cm) wide by 14 inches (35.5 cm) tall.
- Strap Length: 24 inches (61 cm) for an over-the-shoulder fit.
- Skill Level: Easy Intermediate.
- Time to Complete: 10–15 hours depending on your speed.
- Techniques Used: Magic Ring, cluster stitches, back-loop-only joining, circular increases.
- Best For: Carrying groceries, craft supplies, or as an everyday handbag.
The design twist here lies in the “squaring round” of the motif, which turns a circular flower into a perfect square. This allows you to customize the look by changing the petal colors while keeping the background consistent. You can use scraps from your stash for the centers and petals, making this a fantastic stash-buster project.
Materials And Tools You’ll Need
Yarn
For this project, I recommend a medium weight (worsted) cotton yarn. Cotton is essential here because it provides the stiffness needed to keep the bag from stretching out of shape when filled. You will need approximately 600 yards (548 meters) in total across four different colors: 300 yards (274 meters) for the background color, and 100 yards (91 meters) each for the three flower colors. I recommend using a high-quality mercerized cotton, as it provides excellent stitch definition and won’t fuzz over time. Recommended brands include Lily Sugar’n Cream for accessibility, Knit Picks Dishie for a softer feel, or Scheepjes Cahlista for a vibrant color palette. To substitute, look for any yarn that meets the gauge requirements and has minimal stretch.
Hook
You will need a 4.5 mm (US size 7) crochet hook. If you find your stitches are too tight and the fabric is stiff, go up to a 5.0 mm (US size H-8) hook. If your work looks gappy or loose, drop down to a 4.0 mm (US size G-6) hook.
Additional Supplies
- Tapestry needle for weaving in ends.
- Stitch markers (at least 4) to hold pieces together during assembly.
- Scissors for trimming yarn.
- (Optional) 2 D-rings or leather strap connectors for attaching handles.
- (Optional) 4 wooden beads for the drawstring ends.
Gauge
Before you begin, create a swatch measuring 4 inches by 4 inches (10 cm by 10 cm) using your background color and the 4.5 mm hook. Your swatch should yield 16 stitches across and 16 rows. Gauge is crucial for this project because if your motifs are too large or too small, the bag’s circumference will not match the circular base. If your gauge is off, try changing your hook size first. If that doesn’t work, ensure you are maintaining consistent tension throughout your stitches.
Abbreviations And Special Stitches
Crocheting a bag can feel intimidating, but remember that every complex design is just a series of simple stitches worked one after another. Let’s get comfortable with the shorthand.
- ch = chain (UK: chain). Yarn over and pull through the loop on your hook.
- sl st = slip stitch (UK: slip stitch). Insert hook, yarn over, pull through both loops.
- sc = single crochet (UK: double crochet). Insert hook, yarn over, pull through, yarn over, pull through both loops.
- hdc = half double crochet (UK: half treble). Yarn over, insert hook, yarn over, pull through, yarn over, pull through all three loops.
- dc = double crochet (UK: treble). Yarn over, insert hook, yarn over, pull through, yarn over, pull through two loops, yarn over, pull through remaining two.
- sp(s) = space(s) (UK: space(s)). The gap between stitches.
- st(s) = stitch(es) (UK: stitch(es)).
- MR = Magic Ring (UK: Magic Ring). A method to start a round by creating an adjustable loop.
- rep = repeat (UK: repeat).
Important note for UK crocheters: Please remember that US and UK terms differ. If you see “sc,” it is a US single crochet; work it as a UK double crochet. If you see “dc,” it is a US double crochet; work it as a UK treble.
Special Stitch: Cluster Stitch
The cluster stitch is used to give the flower petals their 3D texture. To work a cluster, yarn over, insert hook into space, pull up a loop, yarn over, pull through two loops. Keep the remaining two loops on your hook. Repeat this two more times (3 loops on hook), then yarn over and pull through all loops. Keep your tension loose to ensure the stitch doesn’t pull tight against the fabric.
Pattern Notes Before You Begin
Read through these tips before you start. They’ll save you headaches later.
- Make sixteen individual motifs, working from the center outward.
- Join all pieces with a continuous yarn strand.
- The starting ch-3 usually counts as a dc unless noted otherwise.
- Weave in your ends as you go to avoid a massive cleanup at the end.
- Use stitch markers to keep the grid aligned.
- Fasten off cleanly after every round where a color change is required.
- Do not pull your joins too tight or the bag will pucker.
- Count your stitches after every round; precision ensures the base fits the body.
Color placement is key to the aesthetic. Alternate your flower colors across the grid to ensure that no two squares of the same color are touching. This creates a balanced, professional look.
Complete Step-by-Step Crochet Pattern
Part 1: The Motif / Square (Make 16)
Round 1 (Color A – Center): Start with a MR. Ch 3 (counts as dc), work 11 dc into the ring. Join with sl st to top of ch 3. (12 dc)
Round 2 (Color B – Petals): Join Color B in any st. Ch 2, cluster into the same st, ch 2. *Cluster in next st, ch 2; rep from * around. Join with sl st to first cluster. (12 clusters, 12 ch-2 sps)
Round 3 (Color C): Join Color C in any ch-2 sp. Ch 3, 2 dc in same sp, ch 1. *3 dc in next ch-2 sp, ch 1; rep from * around. Join with sl st to top of ch 3. (36 dc, 12 ch-1 sps)
Round 4 (Color D – Squaring Round): Join Color D in any ch-1 sp. Ch 3, 2 dc in same sp, ch 2, 3 dc in same sp (corner made). *3 dc in next two ch-1 sps, in next ch-1 sp work (3 dc, ch 2, 3 dc); rep from * two more times. 3 dc in next two ch-1 sps. Join with sl st to top of ch 3. (48 dc, 4 ch-2 sps)
Part 2: Assembly
Arrange your 16 squares in a 4×4 grid. Using a whipstitch through the back loops, join the squares together. Fold the completed grid and join the final edge to create a tube.
Part 3: The Circular Base
Work 8 rounds of increases starting with 12 sc in a MR, increasing by 12 stitches every round (12, 24, 36, 48, 60, 72, 84, 96). Ensure the final round matches the circumference of your motif tube.
Part 4: Attaching Base to Body
Pin the base to the bottom edge of the motif tube. Using a tapestry needle, sew the base to the body using a secure overcast stitch.
Part 5: Upper Yoke & Eyelets
Work 2 rounds of sc around the top of the motif tube. Eyelet round: *ch 1, sk 1, dc in next st; rep around. Finish with 2 rounds of hdc to provide a clean edge.
Part 6: Drawstring, Strap & Hardware
Chain 150 stitches for the drawstring. Thread it through the eyelet rounds. Attach D-rings to the top edges for your strap.
Part 7: Tassels
Wrap yarn 30 times around a 4-inch piece of cardboard. Tie, cut, and attach one to each end of the drawstring.
Joining The Pieces And Creating The Body
Lay your grid flat. Ensure the color distribution is even. Using the background color, join the squares by working a sl st through the back loops only. This creates a raised, decorative seam that mimics a professional finish. Ensure each corner aligns perfectly before seaming. Once the flat grid is joined, fold it in half and join the vertical sides to form a cylinder.
The Base
The base is the foundation of your tote. Work in joined rounds, ensuring each round starts with a chain that does not count as a stitch. Increase consistently to prevent cupping. If the base begins to cup, increase more frequently in the next round. If it ruffles, reduce the number of increases. Once finished, pin the base to the body at four cardinal points to ensure even distribution before sewing.
The Yoke / Top Edge
Pick up stitches around the top edge of the motif tube. You should have 96 stitches. Work the eyelet round carefully; skipping one stitch for every ch-1 space is vital for the drawstring to function. After the eyelet round, work two rows of hdc to strengthen the top edge, as this area will bear the weight of the bag’s contents.
Strap Loops
Attach two crocheted tabs (ch 10, turn, 10 sc) at the center sides of the bag. Sew these securely through both the yoke and the top of the motifs to ensure they do not tear under pressure. Attach your straps to these loops.
Drawstring, Strap And Tassels
The drawstring is a simple chain of 150 stitches, which you can twist slightly for strength. Thread this through the eyelets, alternating under and over. For the straps, if you don’t have leather, braid six strands of your background yarn until you reach 24 inches (61 cm). Secure with knots and attach to the D-rings.
Finished Size
The completed tote measures 12 inches (30.5 cm) in width and 14 inches (35.5 cm) in height. The base is 9 inches (23 cm) in diameter. These dimensions are approximate and may vary slightly based on your personal tension.
Care Instructions
Hand wash your bag in cool water with a mild detergent. Lay it flat on a towel to dry, reshaping it while damp. Do not hang the bag while wet, as the weight of the water will stretch the fibers. Remove any leather or metal hardware before washing if possible.
Customization Ideas
- Make it taller: Add another row of motifs to the grid.
- Make it wider: Add more stitches to the base and increase the grid to a 5×4 layout.
- Use thicker yarn: Adjust your hook size accordingly; note that you will need more yardage.
- Add a lining: Sew a fabric liner inside to prevent small items from falling out of the gaps.
- Use a button closure: Instead of a drawstring, add a single large wooden toggle.
- Add fringe: Add fringe to the bottom of the motifs for a bohemian vibe.
Troubleshooting
Cupping Base
Cause: Too few stitches. Fix: Add an extra increase round.
Ruffling Base
Cause: Too many stitches. Fix: Work a round of straight stitches without increases.
Uneven Seams
Cause: Incorrect alignment. Fix: Use more stitch markers.
Curling Edges
Cause: Tension too tight. Fix: Use a larger hook.
Running Out of Yarn
Cause: Estimating errors. Fix: Use a neutral color for the join that you have in abundance.
FAQ
Is this beginner friendly?
Yes, the pattern uses basic stitches and is broken down into small, manageable parts.
Can I use a different yarn?
You can, but ensure it is a cotton blend to maintain the structure of the bag.
Can I wash it?
Yes, hand washing is recommended to preserve the shape and color of the motifs.
How much yarn do I need?
You need approximately 600 yards (548 meters) in total.
Can I sell finished items?
Yes, you are welcome to sell finished items provided you give credit to the designer.
Final Thoughts
Designing this bag has been a joy, and I am so excited to see the colors you choose. This project is a wonderful way to practice your tension and color work, resulting in a functional, beautiful accessory that you can be proud to carry.
If you enjoyed this pattern, please share your progress on social media. I love seeing how your creative choices change the look of the project. Don’t forget to save this to your Pinterest boards for your next crochet session!
Thank you for letting me be a small part of your creative journey. Happy hooking!
Permission Note: Finished items may be sold with credit given to the designer. Pattern reproduction is not permitted.
Author Box: I am a lifelong crochet enthusiast and designer who believes every stitch tells a story. When I am not designing patterns, you can find me hunting for the perfect skein of yarn or dreaming up my next floral-inspired project. I love helping makers find their confidence with every loop.