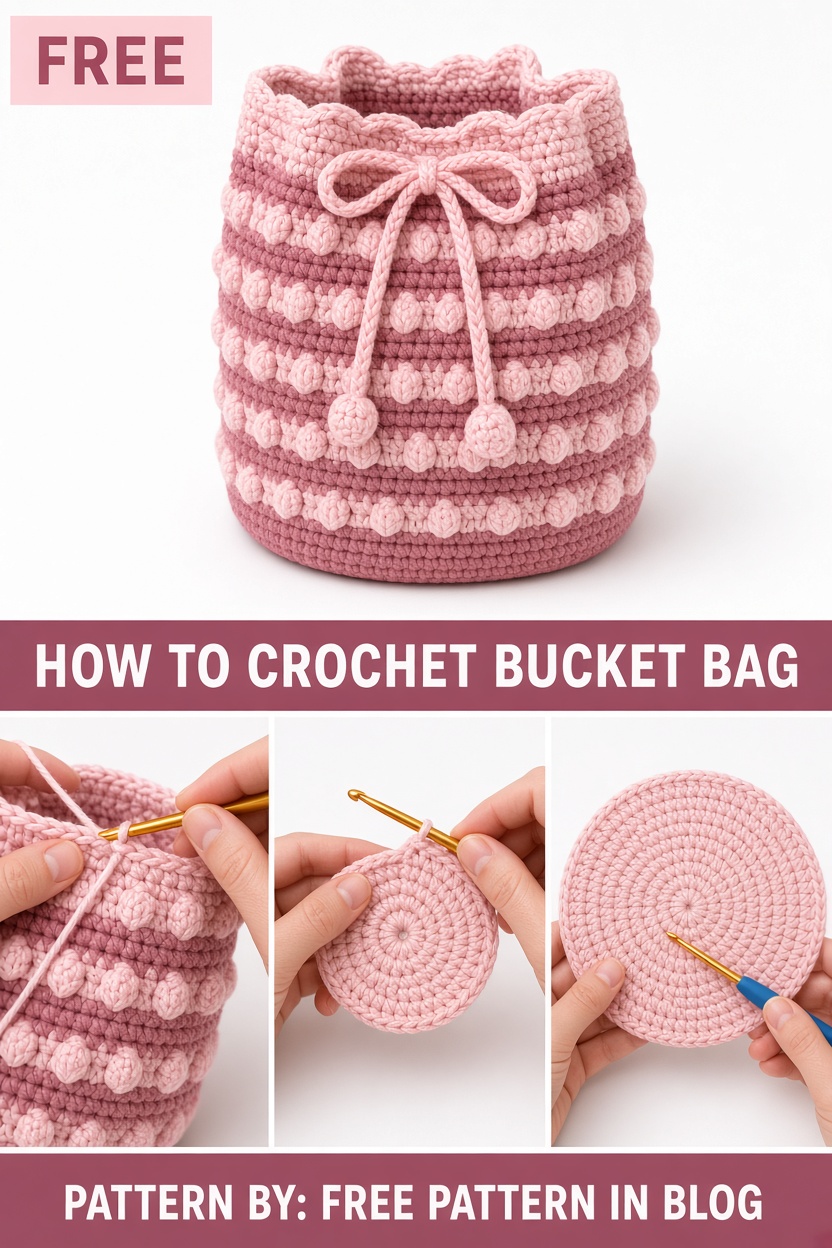
Introduction
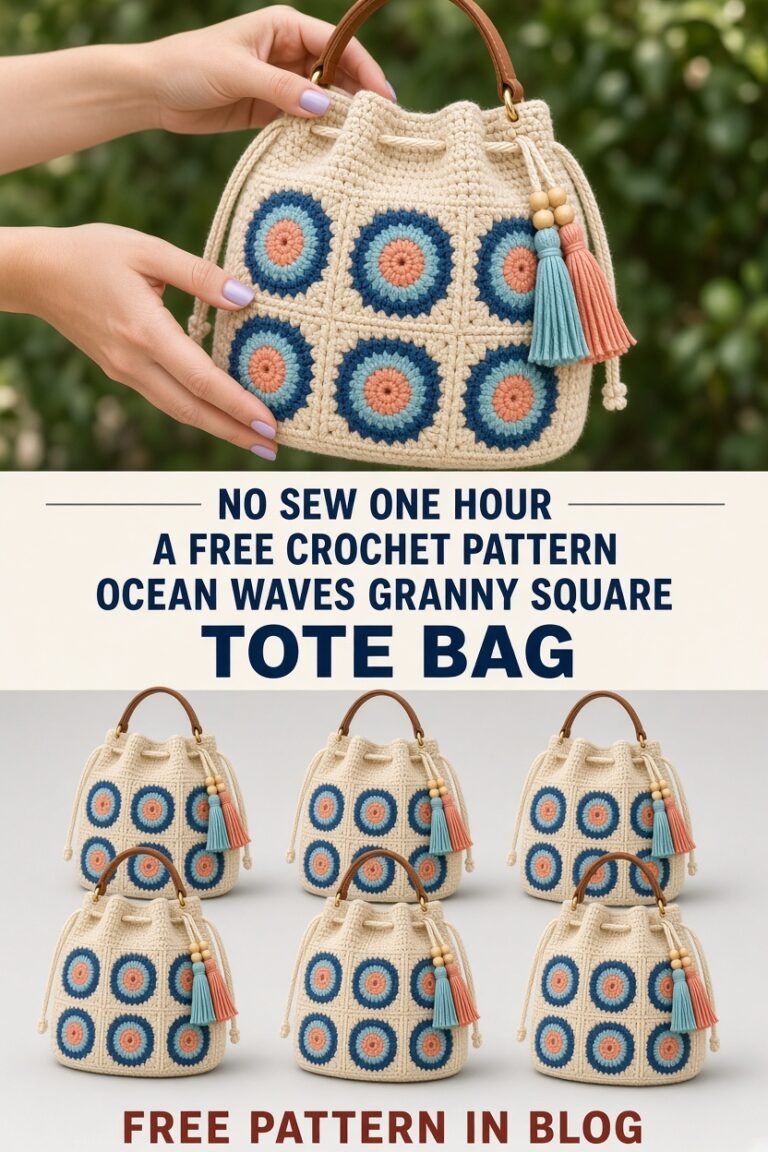
There is nothing quite like the feeling of crafting a handmade gift for someone special. I remember sitting by the window on a chilly autumn afternoon, tea in hand, searching for the perfect project to gift my sister for her birthday. I wanted something practical yet stylish, a piece that felt personal but also professional. That is how the Mini Bucket Bag Free Crochet Pattern Best Gift Idea was born. After playing with several yarn weights and testing countless motifs, I finally found the perfect balance of structure and drape.
This design evolved from a simple square motif I had been experimenting with for a scrap-yarn blanket. I realized that by joining these squares into a tube and adding a reinforced base, I could create a bag that held its shape perfectly without needing heavy interfacing. It is a rewarding process that transforms basic stitches into a functional fashion accessory.
The finished piece is a compact, chic bucket bag that fits your phone, keys, and a small wallet. It is ideal for farmers markets, casual coffee dates, or as a thoughtful gift for a friend. Because it is a free pattern, you can make as many as you like in different colors to match any outfit.
Whether you are a beginner looking to expand your skills or an experienced crafter seeking a quick, satisfying make, this project offers clear instructions to guide you through every stitch. Let’s get started on creating your very own mini bucket bag.
About This Mini Bucket Bag Pattern
This mini bucket bag is built using a modular construction method. We begin by crocheting a series of square motifs that are joined to form the main cylindrical body. Once the tube is complete, we add a sturdy circular base that is crocheted separately and whip-stitched to the body. The top edge features an eyelet round designed for a drawstring closure, and the final look is finished with decorative tassels.
Quick Facts: Finished size is 7 inches (18 cm) wide and 8 inches (20 cm) tall. The strap has a 20-inch (51 cm) drop. Skill level: Beginner. Time to complete: 6–8 hours. Techniques used: Magic Ring, slip stitch join, single crochet, double crochet, and whip stitch seaming. Best for: Gift giving and everyday casual use.
The design twist here is the structural integrity of the base. By working in continuous rounds with strategic increases, we ensure the bag does not slouch when placed on a table. You can customize this by changing the color of each motif or choosing a solid color for a more minimalist aesthetic. The choice of hardware for the strap allows you to swap out leather or fabric handles, making this design truly versatile.
Materials and Tools You’ll Need
Yarn
For this project, I recommend a medium weight (Category 4) worsted cotton yarn. Cotton provides the necessary stiffness to keep the bag shape consistent. You will need approximately 250 yards (229 meters) total. Recommended brands include Lily Sugar’n Cream, Lion Brand 24/7 Cotton, or Paintbox Yarns Cotton Aran. These are widely available, affordable, and machine washable, making them perfect for bags. To substitute, look for any smooth, non-stretchy yarn in the same weight.
Hook
Use a 4.0 mm (US G/6) crochet hook. If your stitches are naturally loose, go down a size to a 3.75 mm (US F/5) to ensure the fabric remains dense enough that small items do not poke through the holes.
Additional Supplies
- Stitch markers (to keep track of corners and rounds).
- Tapestry needle (for weaving in ends).
- Scissors.
- Leather or fabric cord for the drawstring (approx. 30 inches or 76 cm).
- Two D-rings (optional).
- Small wooden beads for tassel decoration (optional).
Gauge
To ensure your bag comes out to the correct size, please work a swatch using your chosen yarn. A 4-inch by 4-inch (10 cm x 10 cm) square should result in 16 stitches and 18 rows using single crochet. If your swatch is larger, your bag will be too big and the fabric will be flimsy. If it is smaller, the bag will be tight and harder to assemble. Adjust your hook size accordingly to meet this gauge.
Abbreviations and Special Stitches
Don’t be intimidated by the terminology. Crochet is a language of shorthand that makes patterns easier to read once you master the basics. Here are the abbreviations used in this pattern: ch = chain, sl st = slip stitch, sc = single crochet, hdc = half double crochet, dc = double crochet, sp(s) = space(s), st(s) = stitch(es), MR = Magic Ring, rep = repeat. Important note for UK crocheters: In the UK, the US single crochet is called a double crochet, and the US double crochet is called a treble crochet. Ensure you are following the US definitions provided above.
Special Stitch: Magic Ring
The Magic Ring is used to start the base without leaving a hole in the center. Hold the tail of your yarn in your palm, wrap the working end around your index and middle fingers, then cross it over to form an X. Insert your hook under the first loop, pull up a loop, and ch 1 to secure. Work your stitches into this loop, then pull the tail tight to close the center completely. Keep the loops even for a neat appearance.
Pattern Notes Before You Begin
Read through these tips before you start. They will save you headaches later.
- Work all motifs separately before joining them.
- The body is worked in joined rounds.
- Always join new colors with a fresh slip knot for a seamless transition.
- The starting chain does not count as a stitch unless specified.
- Weave in ends as you go to avoid a massive chore at the end.
- Use stitch markers to hold seams together while sewing.
Complete Step-by-Step Crochet Pattern
Part 1: The Motif
Round 1 (Color A): Start with MR, ch 3 (counts as dc), 2 dc in ring, ch 2, [3 dc, ch 2] 3 times, sl st to top of ch 3 (12 dc, 4 ch-2 sps). Round 2 (Color B): Ch 3, dc in same sp, dc in next 3 sts, [2 dc in ch-sp, ch 2, 2 dc in same ch-sp] 4 times, sl st to join (28 dc, 4 ch-2 sps). Round 3 (Color C): Ch 3, dc in each st around, putting 2 dc, ch 2, 2 dc in each corner sp, sl st to join (44 dc, 4 ch-2 sps). Round 4 (Color D): Ch 1, sc in each st around, placing 3 sc in each corner sp (52 sc). Fasten off and weave in all ends.
Part 2: Assembly
Arrange your 6 motifs in a 6×1 grid. Using the whipstitch method, sew the motifs together by the back loops only. Once the strip is finished, fold it and sew the short ends together to create a tube.
Part 3: The Circular Base
Round 1: MR, 8 sc in ring, pull tight, sl st to first sc (8 sc). Round 2: 2 sc in each st around (16 sc). Round 3: [1 sc, 2 sc in next] around (24 sc). Round 4: [2 sc, 2 sc in next] around (32 sc). Continue increasing by 8 stitches every round until you reach 72 sc total. This should match the circumference of your motif tube.
Part 4: Attaching Base to Body
Align the base with the bottom of the motif tube. Using a tapestry needle and a length of matching yarn, whipstitch through the back loops of both the base and the motif bottom edge. Ensure the stitches are evenly spaced.
Part 5: Upper Yoke & Eyelets
Pick up 72 sc around the top edge of the bag. Round 1: Ch 1, sc in each st (72 sc). Round 2 (Eyelet Round): Ch 3 (counts as dc), *skip 1 st, dc in next, ch 1; rep from * around, sl st to join (36 dc, 36 ch-1 sps). Round 3: Ch 1, 2 sc in each ch-sp around (72 sc).
Part 6: Drawstring, Strap & Hardware
Chain 150 (approx. 45 inches or 114 cm). Fasten off. Weave this cord through the eyelets of the yoke. Attach a tassel to each end. For the strap, chain 120, then sc back across. Attach to the sides of the bag using the D-rings provided.
Part 7: Tassels
Wrap yarn around a 3-inch card 20 times. Cut a 6-inch piece of yarn and tie off the top securely. Tie another piece around the neck of the tassel. Trim the bottom evenly. Attach one to each end of the drawstring.
Finished Size
Width: 7 inches (18 cm). Height: 8 inches (20 cm). Base Diameter: 6 inches (15 cm). Strap Drop: 20 inches (51 cm).
Care Instructions
Hand wash in cold water with mild detergent. Do not bleach. Lay flat to dry on a towel, reshaping the base while damp. Do not hang, as this may stretch the strap. Store in a cool, dry place away from direct sunlight.
Customization Ideas
- Make it taller: Add another row of motifs.
- Make it wider: Increase the base size and add more motifs to the grid.
- Different closures: Use a magnetic snap instead of a drawstring.
- Add lining: Sew a fabric bag inside to prevent small items from falling out.
- Use bulky yarn: Keep in mind this will drastically change the size and require a larger hook.
Troubleshooting
Base is cupping
This means your tension is too tight. Ensure you are meeting gauge or move up one hook size.
Base is ruffling
This means you have too many increases. Double-check your stitch count against the pattern instructions.
FAQ
Is this beginner friendly?
Yes, the stitches are basic, though assembly requires patience.
Can I use different yarn?
You can, but ensure the weight matches to maintain the bag structure.
How do I make it bigger?
Simply increase the base round count and add more motifs in the grid.
Final Thoughts
Creating this bag is a journey of color and construction. I hope you enjoy the meditative rhythm of the stitches as much as I did.
Please share your creations on social media and tag me! I love seeing your unique color combinations.
Thank you for choosing this pattern and happy crocheting.
Permission Note: Finished items may be sold with credit given to the designer. Pattern text and diagrams are for personal use only.
Author Box
I am a lifelong crafter and professional designer with a passion for functional, beautiful accessories. I believe everyone can create something special with just a hook and a ball of yarn. Happy crafting!